Companion Computers Setup
ODROID XU4 setup
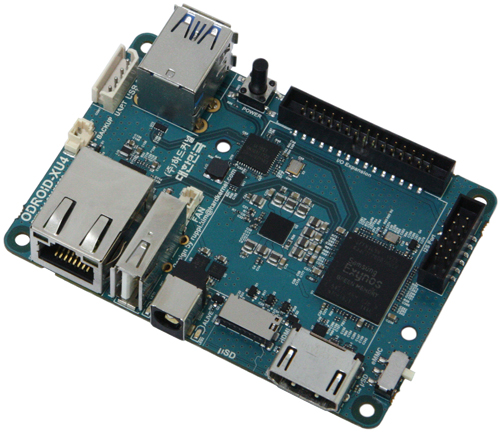
List of components
- ODROID XU4.
- 16GB (or more) eMMc module.
- eMMC reader.
- Micro-SD reader.
- USB-UART Module Kit.
- WiFi Module 3 (2.4Ghz only) good for outdoor use, or WiFi Module 5 dual band 2.4/5Ghz good for high-bandwidth.
- DC plug cable - for onboard/portable power connection.
- Ethernet cable.
Setup Ubuntu
ODROID XU 4 supports both Ubuntu and Android, see the details on odroid page.
Here we will discuss how to setup Ubuntu 16.04LTS
Flashing Ubuntu image
You can use either an SD card or eMMC. eMMC is recommended as it is much faster than SD card, 16GB or more is recommended.
You can flash either full ubuntu image with GUI or minimal image. Minimal image will have much smaller size and faster boot and less overhead in general. Extract the downloaded image to obtain the .img image. Then, use Etcher to flash it to either SD or eMMC card. You can extract the /xz image using
xz -d /path/to/image.img.xz
The previous images are bare images in the sense that you will have to install all required software in this tutorial yourself e.g. ROS, MAVORS, OpenCV, …etc.
If you want a ready image with most of the required software in this tutorial, you can find a minimal image (no GUI) for your eyes here.
Note
Until you setup a WiFi connection, you will need to use an ethernet cable to connect your odroid to internet.
User account setup
After a fresh Ubuntu installation, it is recommended to setup a user account for easier handling in the future. The Ubuntu full image (that you download from ODROID repo) already comes with an account called odroid with default password odroid. However, the minimal image (or sometimes called Ubuntu server) is just a bare bones image, and you will need to do a lot of configuration to get it ready.
In the minimal image, you can add a user account (call it odroid) using the following commands. You can do this by plugging a screen, keyboard/mouse, or through the console cable. If you use the console cable, login using the root account (user: root, password: odroid). Also make sure that your odroid is connected to the internet via ethernet cable.
adduser odroid
adduser odroid sudo
apt-get update
apt-get upgrade
If you use the minimal image above (that is already pre-configured), skip this step.
Also, add user to dialout group to access serial ports
sudo adduser odroid dialout
where odroid is the account/user name.
Network Setup
It is recommended that you use static IP address if you plan to use ODROID via a WiFi network. This will reduce latency over wifi.
to set static IP address on full Ubuntu using GUI, check this video.
Warning
You might need to reserve the IP on the router side
To set a static IP address on Ubuntu server (minimal image), do the following.
Open /etc/network/interfaces file for editing.
nano /etc/network/interfaces
Add the following lines
auto wlan0
# the following will auto-start connection after boot
allow-hotplug wlan0
iface wlan0 inet static
address 192.168.0.xxx # choose a static IP, usually you change the last number only for different devices
netmask 255.255.255.0
broadcast 192.168.0.255
gateway 192.168.0.1 # your router IP
dns-nameservers 8.8.8.8
wpa-ssid "wifi_name"
wpa-psk "wifi_password"
Note
You will need modify wlan0 to match the wifi card number on your odroid once the wifi device is connected. Is possible that it changes when you change the wifi device.
To check your wifi card number,
ifconfig -a
If you use the provided minimal image above (that is already pre-configured), but you will need to adjust the WiFi name and password to match your router access point that you use.
Installing packages
Install ROS
To install ROS on ODROID or ARM-based single-board-computer, follow the instructions that is mentioned on the ROS websites. We assume that ROS Kinetic is used.
Important
Install the ROS-Base: (Bare Bones) not the full desktop version
So, when you reach the step to install ROS using apt-get, don’t execute
sudo apt-get install ros-kinetic-desktop-full
Instead, you execute,
sudo apt-get install ros-kinetic-ros-base
After installing ROS, you can install ROS packages that you need individually either by using apt-get or from source.
Install MAVROS
This package is used to interface MAVLink-based autopilots to ROS.
We will simply follow the well documented wiki on MAVROS github page. For simplicity, use the binary installation which is enough for most of the use cases.
Install OpenCV
Apparently, there are different ways to install OpenCV depending on the OpenCV version and your Python version, if you want to use it with Python. There are plenty of tutorial to follow and you can choose the one that suits your requirements. Normal procedures for general Ubuntu can be used. Here, one way is mentioned to install certain opencv version from source. Use the following shell commands to install OpenCV,
### INSTALL OPENCV DEPENDENCIES ###
sudo apt-get install build-essential checkinstall cmake pkg-config yasm libtiff4-dev libjpeg-dev libjasper-dev libavcodec-dev libavformat-dev libswscale-dev libdc1394-22-dev libxine-dev libgstreamer0.10-dev libgstreamer-plugins-base0.10-dev libv4l-dev python-dev python-numpy libqt4-dev libgtk2.0-dev libavcodec-dev libavformat-dev libswscale-dev libtbb2 libtbb-dev
You can choose your suitable opencv version (check opencv website) and execute the following
### GET OPENCV SOURCE ###
cd ~
wget http://sourceforge.net/projects/opencvlibrary/files/opencv-unix/2.4.9/opencv-2.4.9.zip
unzip opencv-2.4.9.zip
rm opencv-2.4.9.zip
cd opencv-2.4.9
### BUILD AND INSTALL OPENCV ###
mkdir build
cd build
cmake -DCMAKE_BUILD_TYPE=RELEASE -DCMAKE_INSTALL_PREFIX=/usr/local -DWITH_OPENGL=ON -DWITH_V4L=ON -DWITH_TBB=ON -DBUILD_TBB=ON -DENABLE_VFPV3=ON -DENABLE_NEON=ON ..
make
sudo make install
Intel Up Board
- Up board is used in the Intel Realsense development kit.
- Follow this guide to setup the Up board
Using Edimax AC600 Wifi module
You will need to install drivers as follows:
sudo apt-get update
git clone https://github.com/gnab/rtl8812au.git
cd ~/rtl8812au
make
sudo make install
sudo modprobe 8812au
Then, reboot
Note
To be able to use ssh from a remote computer, you will need,
sudo apt-get install openssh-server && openssh-client
Raspberry Pi Setup
Note
To be done.
Intel NUC setup
Note
To be done.